


How to Start Fixing a Gold Necklace Safely
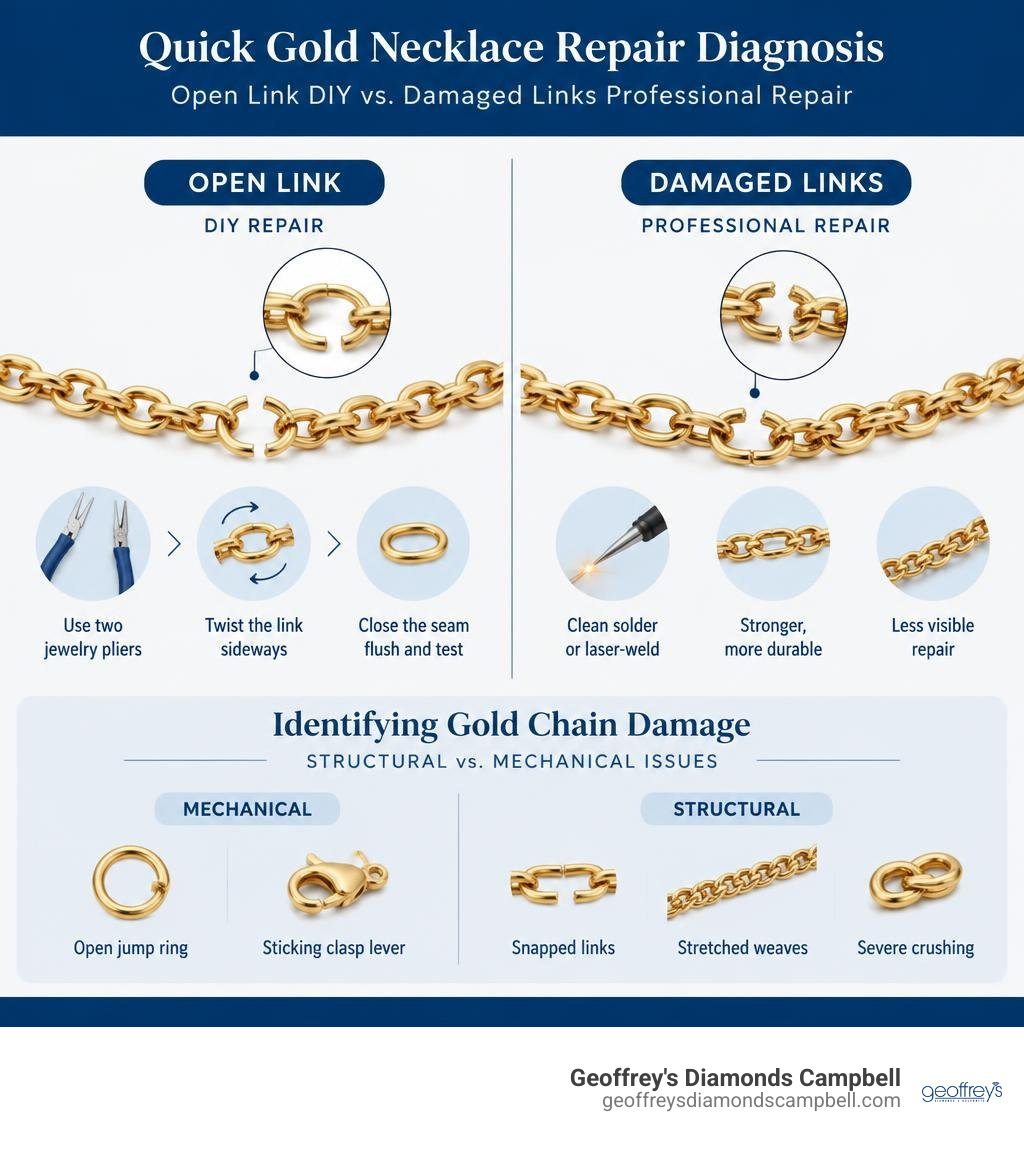
For fixing a gold necklace, first inspect the break under bright light. If one link or jump ring has simply opened and the chain is otherwise sound, you may be able to reconnect it with two jewelry pliers by twisting the link sideways, closing the seam flush, and giving it a gentle pull test.
Do not try a home repair if the chain has crushed, stretched, or repeatedly broken links; a cracked clasp; tiny fractures; gemstones near the damage; or soft, high-karat gold that bends easily. Fine box, snake, wheat, and rope chains often fail from metal fatigue, and forcing a weak link closed can cause another break nearby.
A professional jeweler is the safer choice for structural damage. A clean solder or laser-weld repair can restore the chain with a far less visible and more durable joint than a temporary fix. Most simple repairs are quick, but the right method depends on the chain style, gold karat, break location, and condition of the clasp.
Identifying Gold Chain Damage: Structural vs. Mechanical Issues
When a gold chain gives out, the damage generally falls into one of two categories: mechanical or structural. Mechanical problems involve components designed to move or connect, such as an open jump ring or a sticking clasp lever. Structural problems involve the metal itself failing—think snapped links, stretched weaves, or severe crushing.
Fine chains, such as delicate rope, snake, box, and wheat styles, are particularly susceptible to metal fatigue. Every time you turn your head or adjust your collar, the tiny interlocking wires flex. Over time, that repeated stress causes microscopic hardening, making the gold brittle until a link shears in two.
Before attempting any fix, determine what your chain is actually made of. The composition dictates how the piece responds to pressure and heat.
| Metal Type | Heat Tolerance | Solderability | Best Approach |
|---|---|---|---|
| Solid Gold (10k–18k) | High | Excellent; bonds cleanly with color-matched gold solder | Professional soldering or laser welding |
| High-Karat Gold (22k–24k) | Moderate (low melt point) | Melts quickly; requires careful heat control | Master bench jeweler intervention |
| Gold-Filled | Moderate | Fair; requires delicate flame control to prevent core bleed | Cautious micro-soldering or jump ring fixes |
| Gold-Plated | Very Low | Poor; heat burns and discolors the thin electroplated layer | No-heat mechanical jump ring reconnection |
For complex breaks, review comprehensive restoration guidelines for broken gold jewelry before attempting any heat-based repairs.
Evaluating Karat Purity and Metal Brittleness
The purity of your gold plays a massive role in how it behaves during everyday wear and repair:
- 10k and 14k Gold: Alloyed with copper, silver, and zinc, these karats offer high tensile strength and resist scratches well. However, they can undergo work-hardening over years of friction, leading to clean, sudden snaps.
- 18k Gold: Richer in color and softer under tension. It solders beautifully but bends more easily under heavy pendants.
- 22k and 24k Gold: Pure gold is exceptionally malleable. It deforms under minimal pressure, meaning open links can pull apart simply from a light snag on a sweater.
Deciding Between Home Fixes and Professional Bench Work
Grab a jeweler's loupe or use your smartphone camera on high magnification under a bright, direct light. Look closely at the break site:
- Clear for DIY: The break is a clean separation of an unsoldered jump ring connecting the clasp, or a single open link on a sturdy cable or curb chain.
- Requires a Professional: You see thinned, stretched metal, multiple cracked links, crushed hollow sections, or heat-sensitive gemstones (like emeralds, opals, or pearls) within two inches of the break.
When the metal exhibits micro-fractures, attempting to bend it back with household pliers will often snap the link completely. In those instances, relying on dedicated repair restorations ensures your piece is rebuilt with the proper metallurgical integrity.
Practical Techniques for Fixing Gold Necklace Links and Chains

If your inspection reveals a simple open link or detached clasp tag on a solid, un-soldered chain, you can execute a clean mechanical repair at home.
Essential Tools Required for Fixing Gold Necklace Links
Never grab heavy serrated pliers from the garage toolbox; those jagged teeth will gouge gold in a split second. Assemble these purpose-built tools:
- Two Pairs of Smooth Chain-Nose or Needle-Nose Pliers: Wrap the tips with painter’s tape to provide a soft cushion if you do not have nylon-jaw pliers.
- Jeweler’s Loupe or Magnification Visor: A 10x magnification lets you see exact link alignments.
- Third-Hand Tool with Insulated Tweezers: Keeps the chain stable so your hands are free to maneuver the pliers.
- Soft Microfiber Mat: Prevents microscopic gold links from bouncing onto the floor if dropped.
For a detailed walkthrough on basic re-linking steps, check out this step-by-step gold chain repair guide.
Reconnecting Open Links with Jump Rings
The golden rule of jewelry repair: never pull an open link or jump ring outward like an accordion. Pulling the ends apart ruins the circular shape and weakens the seam.
- Stabilize: Grip the left side of the open link with your first pair of pliers at the 9 o'clock position.
- Grip and Twist: Grip the right side with your second pair of pliers at the 3 o'clock position. Gently twist the right side toward you (a lateral rotation) just wide enough to slip the adjoining link inside.
- Thread: Slide the loose end of the chain or clasp ring into the opening.
- Close Flush: Twist the right side back away from you while applying light inward pressure until the two cut ends meet. You should feel a slight click as the metal faces line up seamlessly with no visible gap.
- Tension Test: Give the chain a gentle tug while holding both sides to confirm the link will not pull open under normal wear.
Repairing and Replacing Faulty Necklace Clasps
Clasps endure friction every single day, making them the second most common failure point after link fatigue. Over 80% of routine clasp issues can be resolved with basic hand tools.
Fixing a Stuck Spring Mechanism
Spring-ring and lobster-claw clasps rely on an internal steel micro-spring. If the lever sticks open, the culprit is often dried soap, body lotion, or built-up debris rather than a broken spring.
- Soak: Immerse the clasp in a dish of warm water mixed with a few drops of mild dish soap for 10 minutes.
- Work the Debris: Take a fine sewing needle or safety pin and gently slide the point along the track of the lever to dislodge trapped residue.
- Exercise the Lever: Work the clasp back and forth rapidly until the internal spring snaps back on its own.
- Rinse and Dry: Rinse with clean water and blow-dry thoroughly.
To prevent future grime buildup that jams delicate mechanisms, integrate routine jewelry care and cleaning into your monthly maintenance habits.
Replacing a Broken Clasp Assembly
If the internal spring has completely rusted through or snapped, cleaning won't help—the clasp must be replaced. Refer to this practical guide to gold necklace clasp repairs for sizing assistance.
- Select a new clasp in the matching gold karat and approximate weight of the original to maintain the necklace's balance.
- Open the connecting jump ring using the lateral twist method described above.
- Slide off the old clasp assembly and slide on the replacement.
- Re-engage the jump ring and twist it closed until flush.
Professional Restoration: Torch Soldering, Laser Welding, and Costs
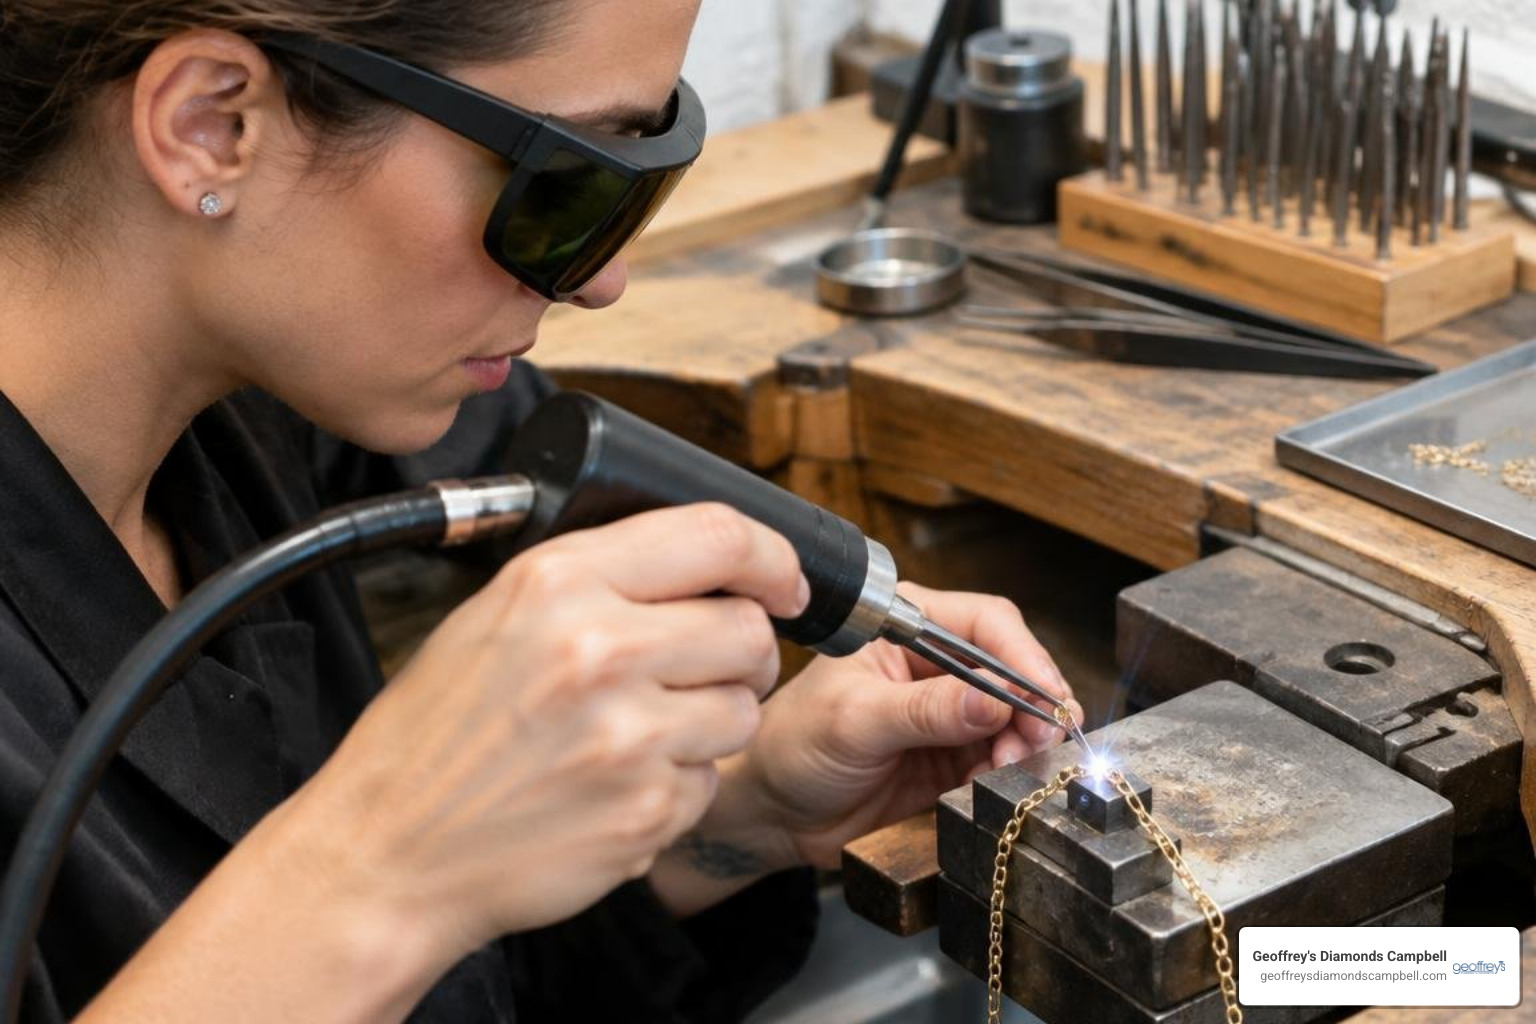
When a link has sheared, crushed, or pulled apart on a soldered chain, mechanical closures are only a temporary band-aid. Permanent restoration requires fusing the metal.
Torch Soldering vs. Advanced Laser Welding
- Traditional Torch Soldering: The bench jeweler cleans the break, applies chemical flux to prevent oxidation, and places a microscopic chip (pallion) of gold solder over the seam. Using a specialized torch or a steel soldering cone to shield adjoining links, heat is applied until the solder flows into the joint. Hard solder (higher gold content) is used for strength, while easy solder is reserved for final low-melt joins. The piece is then bathed in an acid pickling solution to remove fire scale.
- Advanced Laser Welding: A focused beam of light fuses the broken link ends using a tiny piece of matching gold wire alloy. Laser welding introduces virtually no ambient heat to surrounding areas, making it possible to repair links right next to heat-sensitive precious gemstones without unsetting them. The resulting weld produces a seamless, structurally sound bond.
Expected Turnaround Times and Repair Costs
Professional repair pricing depends on the chain thickness, karat, and complexity of the weave:
- Jump Ring Solder: $19 to $35
- Single Link Solder (10k–18k Gold): $30 to $60
- Complex Rope or Box Chain Solder: $50 to $150
- Standard Clasp Replacement (Gold): $35 to $95+ (depending on clasp size and weight)
- Laser Weld near Gemstones: $60 to $120
A standard solder repair takes an experienced bench jeweler roughly 15 to 30 minutes of hands-on bench time, with most local showrooms returning the finished piece within 1 to 2 business days. If you need trusted, on-site diagnostics, you can visit our master bench jewelers for comprehensive jewelry repair in Campbell CA. We also provide expert jewelry repair in San Jose CA and serve clients seeking jewelry repair in Los Gatos CA to ensure fine jewelry is restored safely.
Best Practices for Preventing Future Chain Damage
Preventing chain breakage comes down to smart habits and reducing unnecessary mechanical stress on thin gold wire.
Safe Storage and Daily Wear Guidelines
- Hang Chains Vertically: Storing necklaces loose in a drawer invites knots. Untangling tightly knotted fine chains is a leading cause of link stretching and kinks. Hang them on individual hooks or lay them flat in velvet-lined channels.
- The "Last On, First Off" Rule: Put your gold chain on after applying perfume, hairspray, and lotions, and take it off before removing sweaters or shirts.
- Match Pendant Weight to Chain Gauge: A heavy heirloom pendant on a 0.8mm box chain is a recipe for metal fatigue. The pendant will slowly saw through the links. Ensure your chain gauge is rated for the pendant's mass.
- Remove Before Sleep and Workouts: Tossing and turning pulls chains taut against pillowcases, while workouts expose fine links to sudden tugs and sweat acidity.
If you have valuable vintage or custom pieces, schedule periodic professional jewelry appraisals and inspections so an expert can check for link thinning, clasp wear, and safety catch integrity before an accidental break occurs.
Frequently Asked Questions About Chain Repair
Can I Use Super Glue When Fixing Gold Necklace Pieces?
No. Cyanoacrylate adhesive (super glue) should never be used on fine jewelry. It creates an extremely brittle bond that will quickly fail when exposed to body heat, natural skin oils, and moisture.
Worse, glue leaves a hardened chemical residue inside the micro-cavities of the gold. When you eventually bring the chain to a bench jeweler, that glue burns into a carbon crust under the repair torch, requiring acid treatments to strip the contamination before clean solder will stick.
Will a Repaired Gold Chain Be as Strong as the Original?
A properly executed professional repair—especially one completed with laser welding using identical karat alloy wire—is virtually as strong as the original chain.
However, if your chain snapped due to widespread metal fatigue across multiple links, fixing the single broken link will not cure the surrounding brittle sections. If the entire chain is worn thin, your jeweler may recommend splicing in a new section or replacing the chain to protect your pendant.
Is It Cheaper to Repair or Replace a Broken Gold Chain?
For lightweight, mass-manufactured, low-karat chains, or thin gold-plated costume pieces, a multi-link soldering job can sometimes approach the cost of a replacement.
However, for solid 14k, 18k, or heirloom chains, professional repair is far more cost-effective. If a worn-out chain is structurally beyond repair, you can apply its scrap metal value through professional gold buying evaluations toward a new, sturdier chain or a custom design project.
Conclusion
A broken gold chain does not have to stay tucked away in a jewelry box. While simple open jump rings and sticky clasps can often be addressed at home with the right jewelry pliers and gentle technique, structural breaks, heat-sensitive gems, and fatigued links require the precision of a professional bench jeweler.
At Geoffrey’s Diamonds Campbell, our master craftsmen bring four decades of fine-jewelry expertise to every repair. Backed by our lifetime craftsmanship warranty, we ensure your cherished necklaces, bridal pieces, and custom creations are restored to pristine condition. If your favorite chain needs expert attention, schedule an appointment for master jewelry repair in San Jose CA or visit our Campbell showroom today to let our team bring your jewelry back to life.